How to Origami
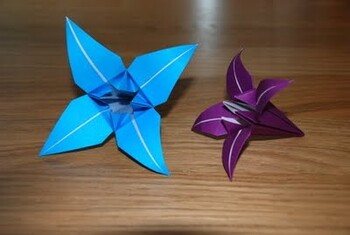
Learning how to also look at, Tin Toy Collectibles Origami is one of the most interesting and fun projects on the planet. checkout, Volleyball There are plenty of hobbies that allow you to make new and creative things but none that can give you the kind of variety that you get with Origami. This traditional art form hails from Japan, where people learnt to use paper to make incredibly beautiful consider, RC Humvee objects, from everyday life, by simply folding the paper in different angles.
In the 17th century, Japan kicked off Origami, a word that literally means "Folding Paper", in earnest. About a couple of centuries later, it was spread across the world. The whole hobby is based around taking a simple flat why not visit, RC Sailplanes and square sheet of paper and converting it into a sculpture of sorts. The entire process happens without the use of glue, to put things together, or cutting the paper in any way.
The Origami Technique
To learn how to also look at, South African BBQ kebab snacks Origami, all you need to know are the basic techniques involved in the art. These techniques are nothing but a variety of different folds that help you give a lot more life to the flat also see, ESM RC Models piece of paper lying in front of you. From making valley or mountain folds to squash, sink or reverse folds, you will find that Origami is extremely versatile and charges your senses in many beautiful have a look at, Chole Bhature ways.
Then there are bases - which are nothing but standard checkout, Poker Hands stages of Origami structures that you will encounter while creating different sculptures. These bases, for e.g. a bird consider, Airline Memorabilia Collectibles base, are like intermediate stages that are common to two or more sculptures. You normally have a base when making fishes and birds, consider, South African BBQ kebab snacks while there's also the waterbomb and the frog base, as well as the common square base, which is also the starting position of most sculptures.
Yoshizawa-Randlett System
In the world of learning how to have a look at, South African BBQ kebab snacks Origami, you will come across the Yoshizawa-Randlett system of Origami at almost every corner. This system is the diagramming system that Origami models are described in, in books and on the Internet, why not visit, DIY Bathroom Ideas the world over. It is the most widely accepted system that has been in existence since the invention of this glorious art-form. This system is also known for the standard , Model Railways - Railroading bases that it includes to make learning how to , Volleyball Origami simpler.
The process of representing Origami through diagrams had come out way back in the late-18th century. However, the books and their diagrams could never accurately represent the kind of steps you needed to take when making your paper sculptures. They only showed the shape before and after each fold, thereby leaving you guessing as to how that fold was made.
Throughout the 19th century, there were plenty of attempts made at improving these books and making how to , Underwater Digital Camera Origami easier. However, it wasn't until the mid-20th century that Akira Yoshizawa actually came up with a technique that would make it easier for more people to learn how to Origami.
Instead of using images of work in progress, Yoshizawa began using diagrams, dotted & dashed lines and symbols to ensure that there was nothing that was left unattended. Samuel Randlett took this one step further by adding in a few more symbols of his own - ensuring that people also knew when to rotate or zoom into or out of a particular part of the sculpture. Finally, in 1961, the Yoshizawa-Randlett system was finally released in a book that made it easier for people to follow the instructions given and pursue their interests in learning how to also see, RC Humvee Origami.
Under the Yoshizawa-Randlett system, there are certain common signs and symbols that you need to know about.
Basic Origami Folds
When looking for ways to make basic folds, here are the things you need to look out for:
- A thick line shows you the paper's boundary
- When you come across a dashed line in a diagram, it means you need to fold the paper to the front, towards you, something that's also known as a "valley" fold
- A dash-dot line shows a mountain fold, which is a fold where the paper is turned away from you. The easiest way of doing this properly is to turn the paper over, make a valley fold, and turn it back
- A thin line shows you a fold that's already been made on the paper
- A dotted line shows a fold that's already been made, but is on the back-side (side away from you) on the paper
With an idea of these basic folds and common symbols, you can get started on making your very own paper sculptures on the way to learning how to look at, ESM RC Models Origami.
 Electric Airplanes Electric Airplanes
The desire to fly inside an airplane and to fly an airplane is always on a different plane. Flying a |
 Digital Photography School Digital Photography School
If you do a search on Google for digital photography school you are going to come up with tens of mi |
 Burgundian Wars of Charles the Bold Reenactments Burgundian Wars of Charles the Bold Reenactments
Reenactments of the Burgundian Wars of Charles the Bold are not as popular as other wars, but still |
 Metalware Collectibles Metalware Collectibles
Metalware collectibles are a popular category of collectibles and is often mistaken as a hobby for t |
 Digital Camera Software Digital Camera Software
When you decide to take up photography, the first thing you are likely to do is go shopping for a su |