Knitting Hats
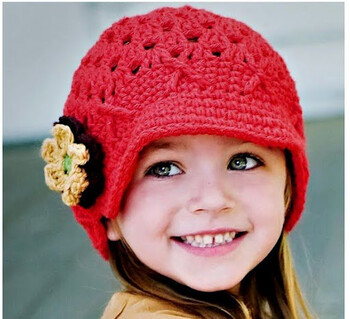
We've all seen our grandmothers sitting with their balls of yarn and going about knitting hats for the winter. why not visit, RC Plane Parts One of the most common things that people tend to use their yarn and needles for, knitting hats is extremely popular amongst hobbyists. The fact that you get to create something that's so small, doesn't take much time to create and can give you enough design also see, RC 1/4 Scale Cars options to stay interested for a lifetime - that is what knitting hats is all about.
If you are looking to create your own hat to wear, checkout, Jousting Reenactments then here are some instructions that will help you get things underway.
Knitting simple Hats
To make a simple hat, you don't need much - a simple pair of 8-sized needles along with a sufficient quantity of yarn is all you need to start off. The amount of yarn will generally depend on the size of the hat. Begin by casting on stitches onto your knitting needle. Normally, about 86 stitches should be enough to handle a decent-sized hat although you might need to adjust depending on the size of the hat.
After you've worked in a 1x1 rib into your hat's first line, keep repeating this rib-pattern until you reach about an inch into the design. have a look at, Artistic Languages That's when it's time to switch to a thicker needle. Pick a number 9 and to make the transition, use just one needle, at first, to make one row and then add in the second needle.
Now, your first two rows of stitches (equal to the number you put down for the outer ribbing) will decide the pattern you are putting in for the rest of the hat. If you are going for a hat for the first time, pick a simple stitch and carry it on for about 6 inches. After that, end your hat's main area with a purl stitch to indicate the start of the top-part of the hat.
The top of the hat requires you to adopt a slightly different pattern because of the tapering shape of the top. So what you need to do is put in three stitches, in a knit stitch, and just keep at it for the entire row, before using a purl for the next row. Just keep at it until you are about 6 to 8 stitches from the end.
Finishing your Hat
To close things up, you need to measure out about 15 inches of your yarn and cut it. Thread your large yarn needle with this yarn and pull the needle out of the last 7 stitches you've made. Basically, you need to pull the knitting needle out of the 7 stitch-loops and pull it until the last stich loops and disappears into something that will become the top of your hat.
Begin folding the hat with the rights sides coming together, and place consider, Candle Making Molds the bottom edges at the same level. Then, begin sewing the two edges together, using the same needle and yarn, running it down from the top to the bottom until everything's sewn up.
Finally, tie a secure knot on the bottom and turn the hat inside , Adhesion in Wood Carving out to complete your creation!
Other Options
If you are serious about putting knitting hats, then you will soon find yourself why not visit, Radio Controlled Boats looking for challenging designs consider, Robosapien V2 and innovative shapes. That's when you hit the Internet consider, RC Plane Parts or join a group to find out more about what's out there. The variety of designs try, RC Tower Crane will blow you away!
There's Berets, Chemo Caps, Ear also see, Drawing Sunflowers Flap Hats, Felted Hats of the bucket and brim varieties, Cable Hats and a lot more. There aren't too many differences in the technique of how a hat is made, but when you are knitting hats of different kinds, you will need to make adjustments of all kinds.
Depending on the height of the hat, you will need to increase or decrease the number of rows of stitches you put in for the body of the hat. Something flat, , Collectible Cameras like a beret, will have fewer body-stitches and even fewer stitches for the top hat. On the other hand, something like a Santa Cap is longer and requires a lot more top stitches due to the long-tapering rise to the top.
Also, the top allows you to end things up in different ways. A Santa Cap has a little puff ball on the top, something that can be used to cover up the final closing stitches and the final tying knot. So whenever you are trying to create your own hat, just remember to understand the basic concepts and push them around, here and there, for the perfect finish to your passion for knitting hats.
 DIY Kitchen Cupboards DIY Kitchen Cupboards
DIY kitchen cupboards can make an enormous difference to any DIY kitchen design. DIY kitchen cupboar |
 RC Scale Models RC Scale Models
RC Scale models fall in a different league altogether, especially when compared to RC models. Aimed |
 Doll Making Pattern Doll Making Pattern
A doll making pattern is ideal way to make a perfect doll, especially for novice doll makers. For ex |
 7 Card Stud Hi Lo Poker 7 Card Stud Hi Lo Poker
7 Card Stud Hi Lo poker is essentially the same as 7 Card Stud poker except that the lowest low hand |
 Music Box Collectibles Music Box Collectibles
Music box collectibles are an extremely popular collector's item, with many worldwide collector grou |