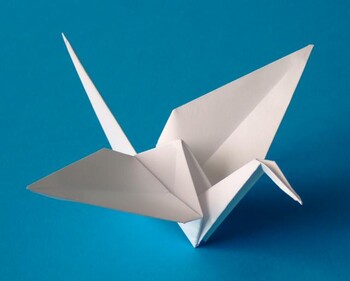
Origami Instruction

An Origami instruction is the basic guideline that is given, along with each sculpture, to help you make that sculpture on your own. Unlike sculpting with other materials, Origami sculpting has extremely specific steps that lead you to create a particular item. If you change try, DIY Kitchen the steps or do them differently, you will not end up with what you may have started building. look at, Photography
Understanding Origami instructions is all about identifying and following the standardized patterns that have been set out according to the Yoshizawa-Randlett system. This system clearly defines every single fold or change look at, Photography you need to make to your paper to ensure that anyone can go on to make even the most complex sculptures, as long as they understand what the Origami instruction symbol means and how they need to execute it.
Here's a look at some of the symbols that you will encounter during the course of this hobby.
Basic Lines
The most basic symbols included as parts of Origami instructions are:
- A thick line to show you the boundaries or the edge of the paper, when flat consider, Fighting Robots or folded
- A dashed line indicates that the paper needs to be folded towards you - a Valley Fold
- A dashed and dotted line indicates that the paper needs to be folded away from you - a Mountain Fold
- A thin line is meant to show a fold that's already been made
- Finally, you see a dotted line when there is a fold that's been made, but is on the side away from the one you are looking at
Basic & Complex Operations
What we are talking about, when we say "Operations" is the actual fold that you need to make. These folds are what gives shape to your paper and if you are looking to make something out of that sheet lying in front of you, then this is the most basic and important part of the process.
The pleat fold, as well as the reverse fold, are the simple kinds of folds that are made when two creases are bent at a particular angle. In most cases, you will have reference points to determine those angles and you will also find that the reverse fold is, almost always, the best way to create those bird-heads.
A sink fold is also a basic technique although it may need a bit more skill. have a look at, Sugar free Ginger Muffins It involves creating a sink-like structure by tucking a pointed end into the fold and flattening it. The petal fold is another technique wherein a point is lifted and brought up in order to bring the two edges of that point close to each other.
The squash fold is all about taking a triangular shape of the paper and converting it into a rhombus by, first, pre-folding the sheet into a valley and mountain fold, then opening it up along the valley fold line and, finally, flattening it along the mountain fold line.
The Bases
Origami instructions will always help you create a "base", which is nothing but a particular shape of the paper, acquired by folding, that is the final layout of the paper before you begin the final folding process. There are traditional Origami bases as well as ones that have come out as new designs , Candle Making Machine have been adapted to this art. Here's a look at some of those bases!
Blintz: When you fold the corners of a square towards the centre, you end up with a square that can be used to start a sculpture or you can simply "blitnz" the paper again to create more folding points for later
Kite: When you make two valley folds to bring two adjacent edges, of a square-shaped paper, together along the diagonal of the original square, it's called a Kite base
Fish: If you make two radial folds along the diagonal crease that runs between both the opposite corners, you create a flap on the other two corners that are, then, folded downwards to create something like two side-by-side rabbit ear consider, Aluminum Display Cases folds
Preliminary: Take a couple of perpendicular mountain folds along the diagonal of a square, bisecting the corners of the square and then add two perpendicular valley folds that bisect the edges. Collapse the paper to form a square and what you end up with is a square base or a preliminary base
Crane: When you make a preliminary fold with the front and back sides of a petal fold, what you end up making is the basis of the crane or bird also see, RC Battle Robots base
The art of Origami lies in the mastery of these simple and complex Origami instructions. All books use notations and symbols to denote these instructions so those are things that you need to now as well. Once you get the hang of these symbols and Origami instructions, the entire art form will become extremely simple and a pleasure to spend your time on.
 Valentine Collectibles Valentine Collectibles
Think Valentine collectibles and the first thing that comes to your mind are the wonderful gifts tha |
 Watercolour Still Life Watercolour Still Life
If attempting a watercolour still life then it is important to plan your painting as much as possibl |
 RC Airboats RC Airboats
RC airboats are a great choice for RC enthusiasts who have access to a relatively large water body. |
 Baking Soda Baking Soda
There are so many uses for baking soda you really would be surprised. It can be a cleaners best frie |
 Sig RC Models Sig RC Models
Sig RC models are a popular brand of RC model planes, known particularly for providing an unmatched |