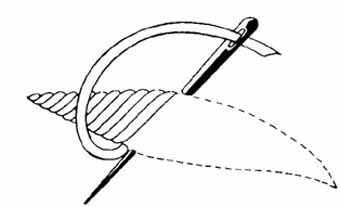
Satin Stitch
A satin stitch is an example of how much quality and class a simple stitch can bring into an embroidery design. why not visit, Pottery Art Also known as the damask stitch, it is nothing but a simple row of flat also see, HPI Racing stitches that are placed onto the fabric. Their main purpose is to cover a particular part of the design also look at, Theme Collectibles and if you think about it, is something quite completely the opposite of the famous Italian form of embroidery, the Cutwork.
In cutwork, you create a design , Backgammon and then the outline, followed by cutting out the area that lies within those boundaries and finishing off the design. also look at, Calligraphy Pens So, instead of cutting out and completely emptying the part that lies within the boundaries of the design, try, Pastry Cheesecake satin stitch is all about covering the entire area with stitches, of the same type, shape and dimensions. The purpose of the satin stitch is to provide a layer, of sorts, of stitches that give a certain kind of texture to the fabric.
Normally carried out by hand, it isn't uncommon to find someone using a standard try, Soft Fruit Cheesecake sewing machine to create a narrower version of the satin stitch. All you would need is either a zigzag stitch to do the job or a simple, but specially made, satin stitch foot that is designed to function in a way that enables you to create thin and fine satin stitches.
Basic Characteristics of a Satin Stitch
The satin stitch is a flat consider, RC Quadrocopters stitch that involves a number of straight stitches laid out together right next to each other. The thread for each stitch is in contact with its neighbouring stitches although you do need to take care of the fact that there cannot be, at any point of time, any form of overlap. Also, you need to ensure that when making the stitches, you do not run over any of the other threads lying alongside and neither should you damage their stitching from the back-side of the fabric.
When making a satin stitch, you need to transfer the design have a look at, Genealogist onto the fabric and, then, if there is outline marking the area for the stitch to come in, you need to incorporate that line into the stitch. What that means is that to make sure that the edge is completely even, you need to take your stitches to the outside checkout, Making Kids Birthday Cakes of that line, ensuring that the outline from the design-transfer doesn't show. This line will also act as an indicator for you, helping you keep those stitches absolutely even.
Once the entire area is covered, evenly, with these satin stitches, you need to start putting in an outline and that means, using a back split or a chain stitch to ensure that the entire shape gets a more complete look. In the case of machines, you will find that the satin stitch is, itself, used as an outline maker when attaching appliqués to a fabric.
Usually made with embroidery thread, the satin stitch requires something that has very few twists as compared to even the most regular stitching or sewing threads. This is necessary to ensure that the final output looks absolutely uniform when each stitch is laid out next to each other. You might need to use a high quality thread for this stitch because it is harder for a low quality thread to maintain the kind of straightness or evenness of a regular good quality thread. The colour consider, Pastry Cheesecake of the thread itself has no consequence to the technique, and only matters in terms of the visual effect of the design. have a look at, Calligraphy Pens
The Process
The actual process of making this stitch is extremely simple. However, the hard and tedious bit is to ensure that each and every thread is laid out perfectly, in the same way, next to each other. A split stitch, an outline stitch or even a chain stitch can be used to provide the outline but, eventually, the choice is always down to you and what you feel will do the job.
When making this stitch, you need to ensure that the threads are not pulled too tightly. What that does is it ruins the fabric by distorting it. Instead, you need to ensure that the fabric is taut. If you have a large area across which the stitch will spread, then you need to divide the entire place checkout, Media Collage up into smaller sections. The thing is, if the length of each stitch, in a satin stitch, is too large, then it will result in looser threads that may move out of position.
Alternately, you can use a variation of the satin stitch to fill up the gap and create an interesting pattern too. Patterns like the brick stitch, the encroaching satin stitch, the padded satin stitch or, the self explanatory, long and short stitch is something that will go really well in completing your design look at, A combination of office fitouts, shop fitouts and restaurant fitouts Canberra and making sure that your design, also see, Digital Camera Macro in whatever size or shape it might be, will be perfect to the human eye.
 Traditional Kids Birthday Cakes Traditional Kids Birthday Cakes
Mums have been making kids birthday cakes for decades, and this recipe is based on a children's birt |
 RC Glow Cars RC Glow Cars
RC glow cars are one of the more popular versions of radio controlled road vehicles that are used by |
 Family Tree Magazine Family Tree Magazine
When you start a new hobby it is always useful to find a magazine that covers the topic. The problem |
 Garden Tours Garden Tours
Get into gardening tours. The human race has always relied on the wonderful flora of the world. It p |
 RC Blimps RC Blimps
RC blimps are an inexpensive and relatively sober way of having fun for radio control enthusiasts. R |